
Initial Setup
To access the Fact Find Portal, you will need to click on the File menu in the top-left corner, then choose the Fact Find Portal option.
If you already have Truth About Money® set up, we’ll use your existing branding details for your Fact Find Portal and you can get straight on with inviting clients. Otherwise, we’ll walk you through the initial setup the first time you click on the Fact Find Portal.
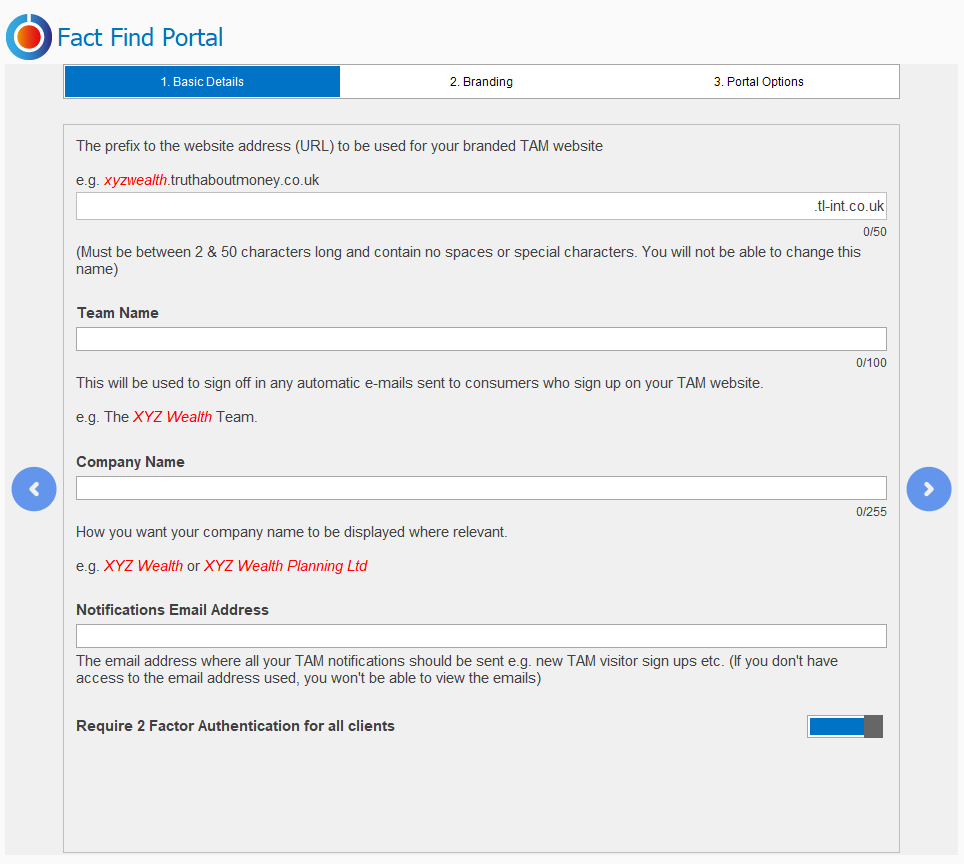
- You’ll need to choose a website address for your portal. Once set up this can’t be changed, only deleted.
- Your Team Name will be used to sign off any emails
- Your Company Name will be displayed on various portal screens
- The Notifications Email Address will receive any notifications, such as confirming when clients have submitted data
- For extra security, you can optionally require clients to use 2-Factor Authentication when logging in
Branding
Branding options can be configured during the initial setup. You can revisit these at any time by going to the Fact Find Portal in Truth® and choosing Portal Config in the top-right.
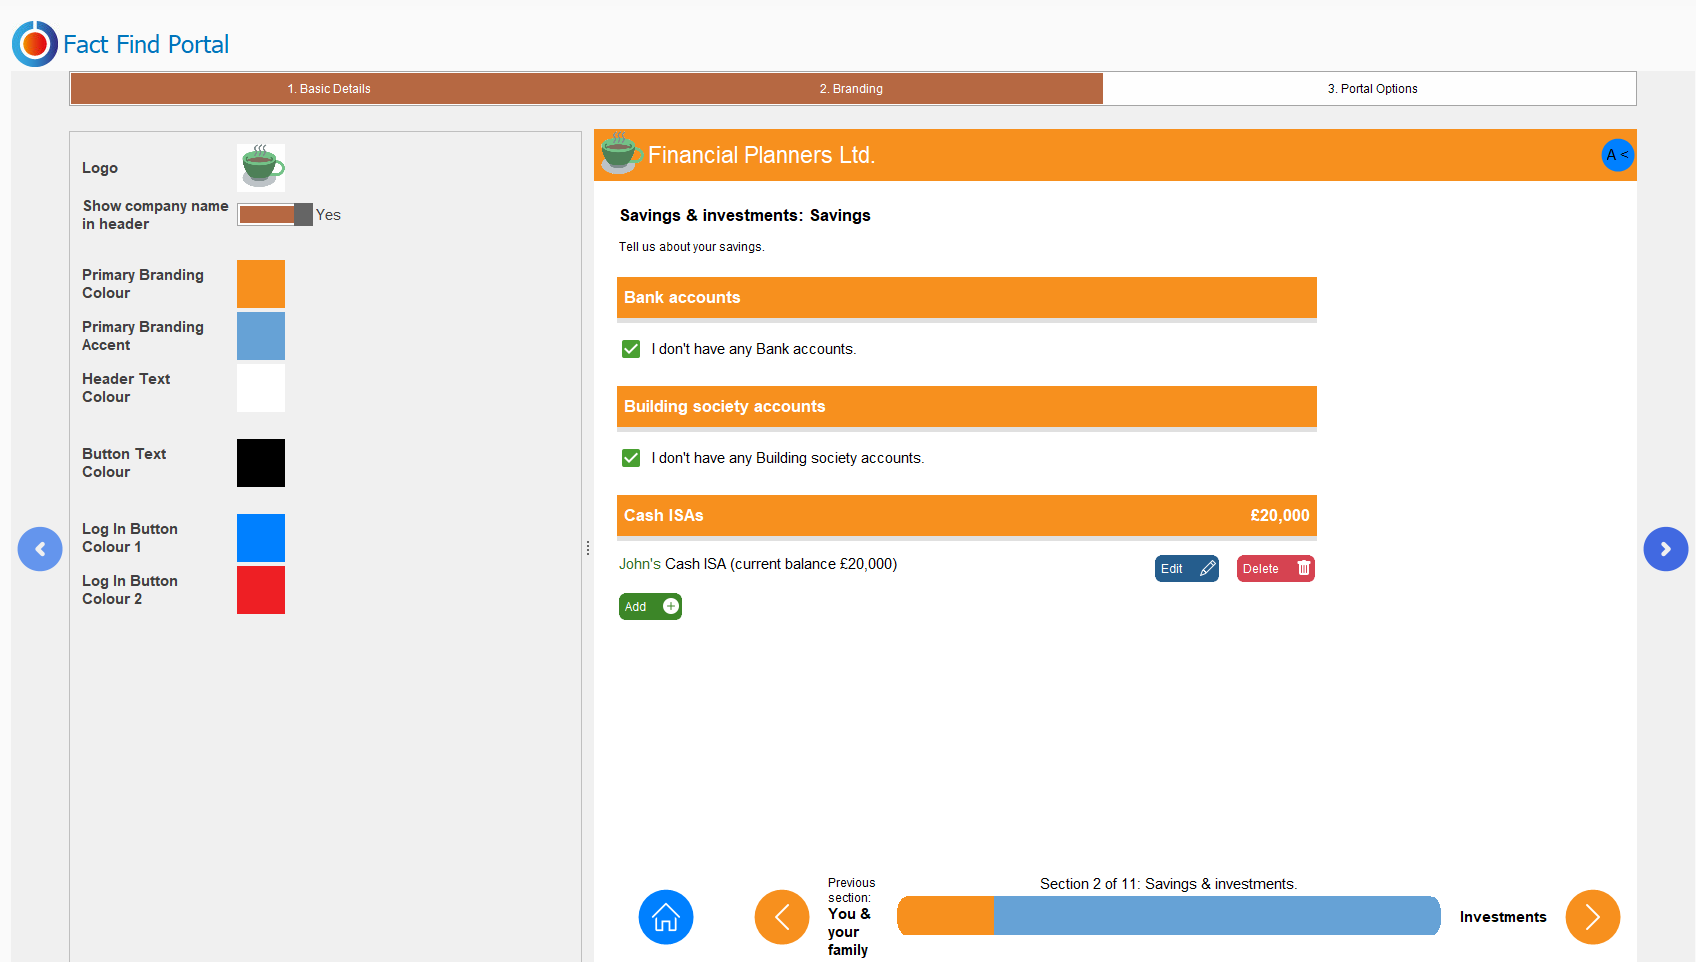
You can add a logo in the top-left corner of your site. The logo needs to be between 48 by 48 and 200 by 200 pixels and works best with a transparent background.
The preview screen on the right will give you an idea of how your finished site will look. To make changes, you can click either on the items on the left of the elements in the preview screen.
Invite text and portal options
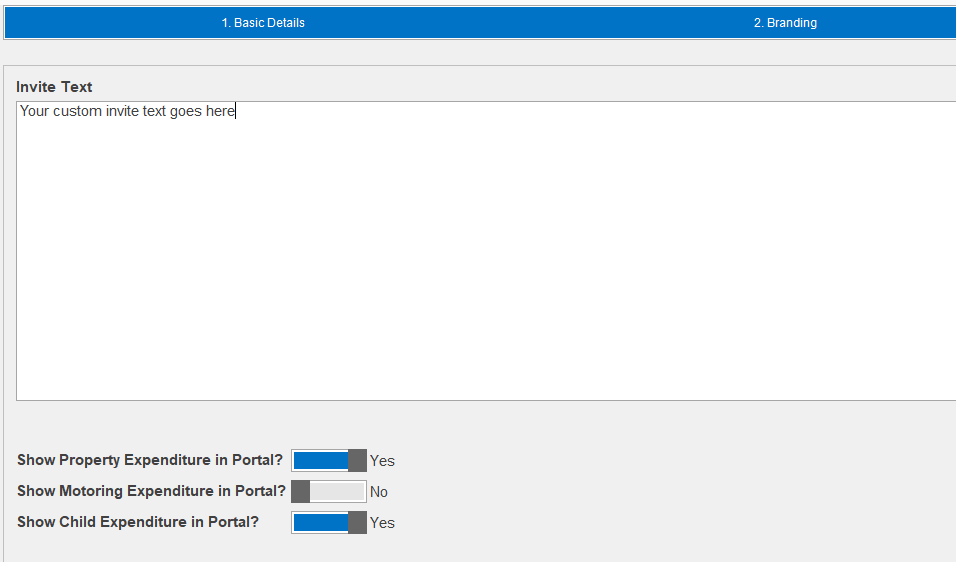
Finally, you can customise the default invite text that will appear in the emails sent to your clients.
We include some basic placeholder text, but you may want to personalise this. You can customise the default text when sending an invite to individual clients, but to save making changes every time it’s a good idea to have something punchy here.
Categories and Headings
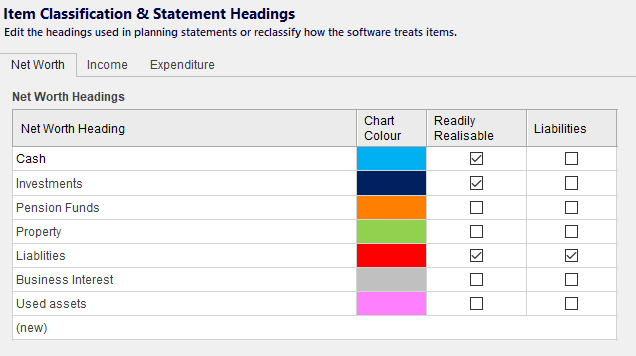
When clients input new assets, income, or expenses in your Fact Find Portal, they will be able to choose from the Categories you have set up in Truth® for each of these.
You may have out-of-date entries in these lists, or categories you set up just for one client in the past.
To tidy up your Categories, simply open any client… go to Settings… then Statement Headings. Here, you can add, rename, or delete categories of Assets, Income, and Expenditure.
Expenditure Prompts
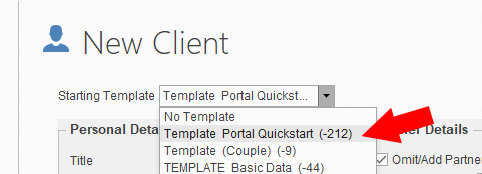
For new clients, having some suggested expenditure items can help capture more accurate information during the fact-finding process. Our Quick Start template contains several expenditure items that you can add to, remove, or customise. Any clients created using this template will see the prompts you set up for them. They can modify, delete, or add to these, as necessary.
If you don’t already have the Portal QuickStart template, go to the File menu and then Imports. Click the arrow to browse your device, then choose the “P:” drive. You should see a file called “Portal Quickstart Template.TRUTH”. Select this file and choose “Open” to upload it into your Truth® data.
Redundant Items
Your client’s fact find may include items that are no longer relevant, such as historic policies, pensions, or one-off expenditure items.
While the export automatically excludes “what-if” items, policies or assets that are not yet in force or purchased and historic items, you may want to review your client’s fact find in Truth® before inviting them to view it via the portal. This gives you the chance to delete anything you might not want your client to see.
Retired Toggle and System Key Dates
The Portal website shows different screens depending on whether or not a client is Retired. This setting can be changed by opening the Client item and toggling the “Retired” option.
When it comes to Spending in the portal, we ask clients what they are spending now, what they will spend in Retirement, and what they will spend in Later Life. If you haven’t already chosen a “retirement” or “Later Life” key date, you will be prompted to do this when you import your client’s data. You can also set this up in advance by going to Settings and selecting a Key Date to correspond to Retirement or Later Life.

To save your changes, click “OK”.
Click on the File menu in the top-left corner, then choose the Fact Find Portal option on the left. Click Send Client Data to Portal to begin the Export process.
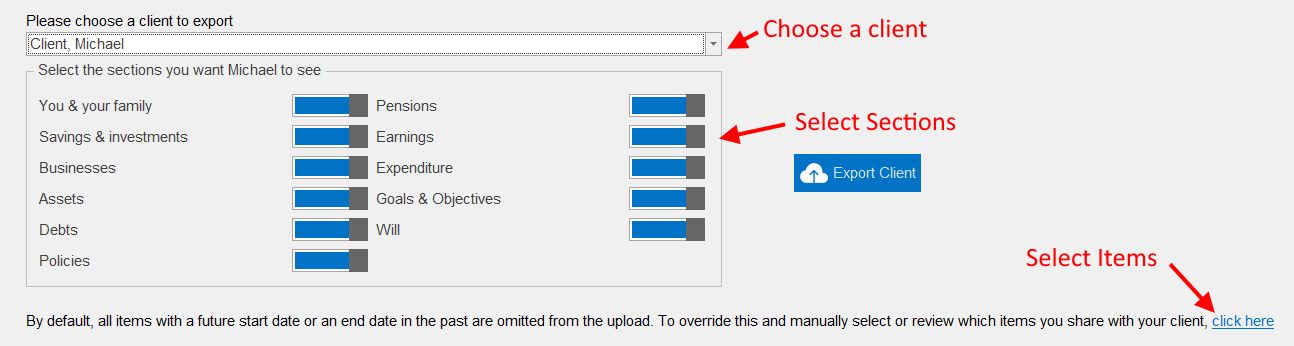
First, you will need to choose a client to export.
Selecting Sections and Items to export
Having selected a client, you can then choose which sections of the portal you want your client to complete. Any sections you toggle off will be completely hidden from the client. For example, if you manage all your client’s protection policies for them, you can exclude this section to save your client having to review this data.
As the caption states: “all items with a future start date, or an end date in the past are automatically omitted.” This includes things like future cars or properties, but future items of spending, such as one-off holidays, WILL be included in the export.
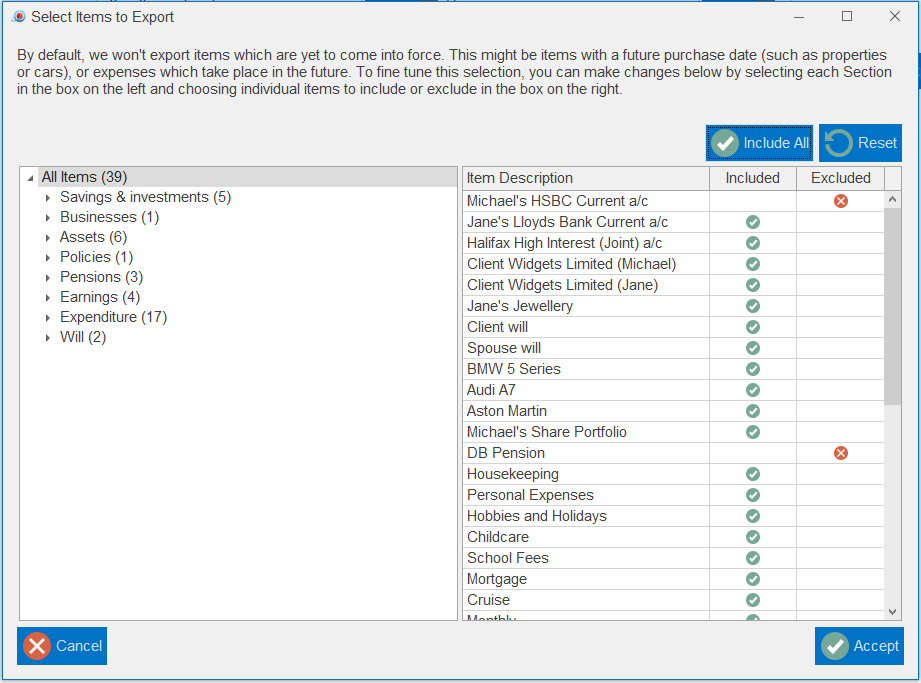
To fine-tune the items that will be shown to your client, click on the hyperlink. You can easily include all items or reset to the default selection using the buttons on the right.
You can also filter to view what your client will see in each section of the portal using the headings on the left.
Click “Accept” when you’re happy with your changes. Then click “Export Client” to upload their data and move on to the Invite Screen.
The Invite Screen
The Invite screen lets you confirm your client’s contact details and customise the invite they will receive.
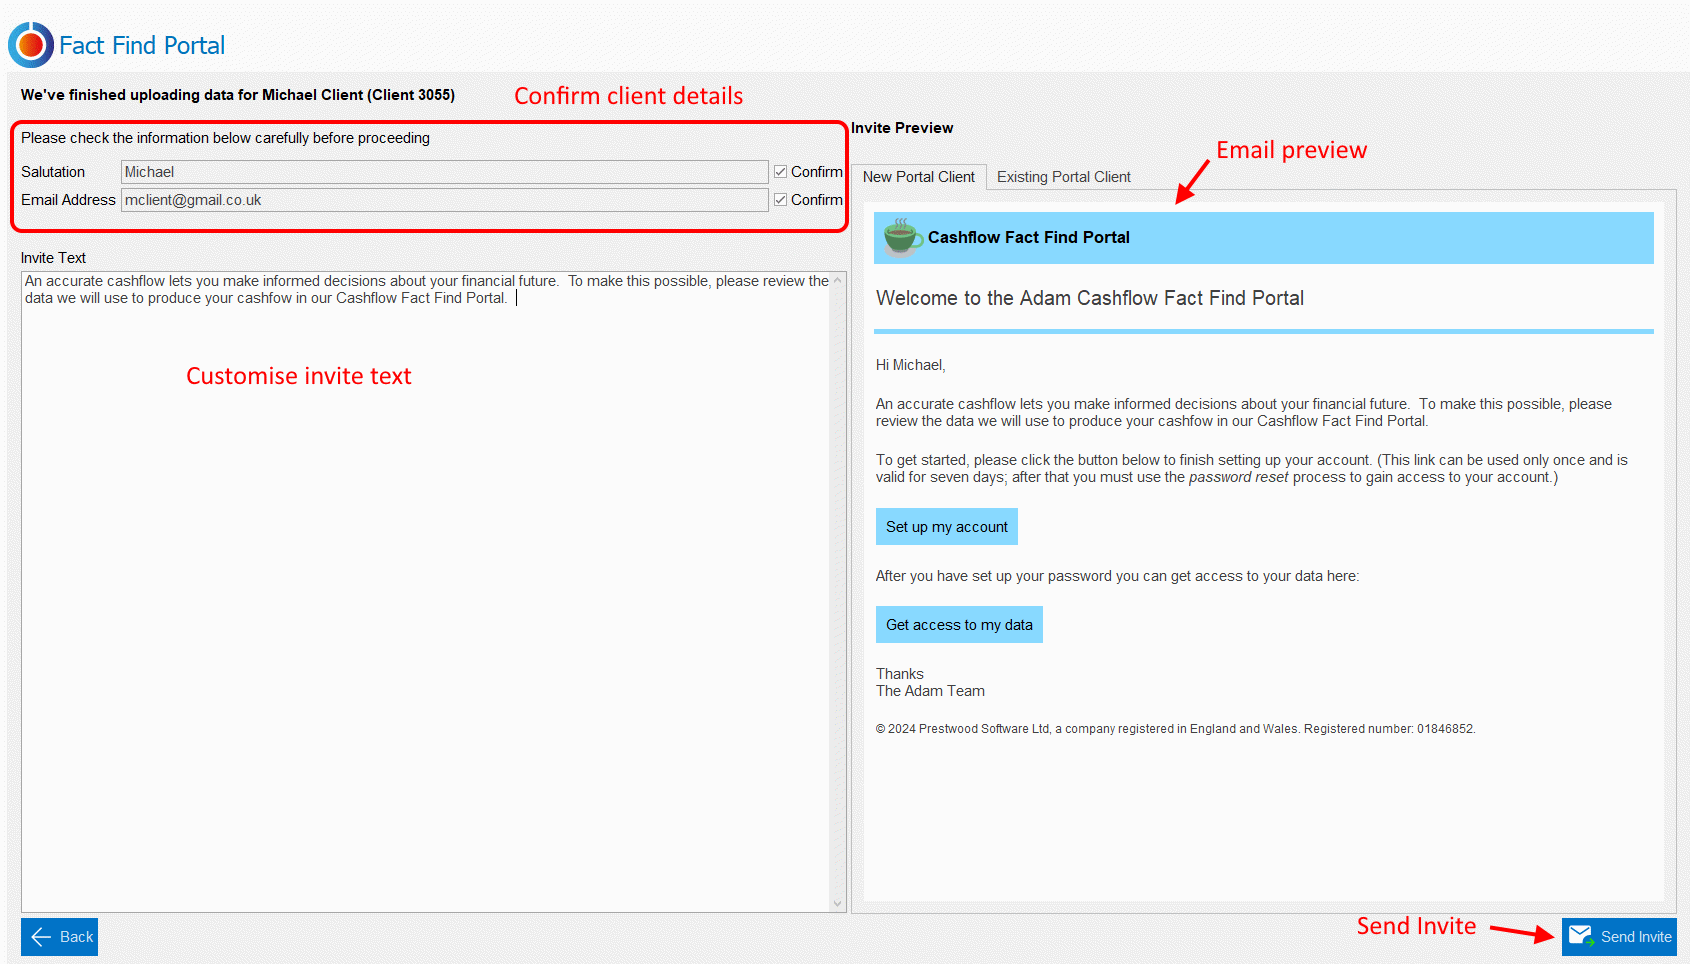
First, confirm your client’s details. The salutation and email address shown are what you have entered in the Client item. You can’t click “Send Invite” until you have confirmed these are correct. Click the “Save” icon to save changes to the Client item.
The Invite Text shown will be whatever you set up in Portal Config. To add bespoke instructions for the current client, type into the “Invite Text” box. The email preview on the right-hand side shows exactly what your client will receive in their inbox.
When you’re happy, click “Send Invite”.
Your client will receive an email displaying the branding options you have configured for your portal, as detailed above.
This is an example of the email your client might receive. Any custom invite text you entered for your client will appear here.
Clients will need to click on “set up my account” to choose a password and complete registration. After choosing a password, they will need to click “Create Account” to finish setting up their account.
Their username will be the email address to which you sent their Portal invite.

Navigating the Portal
The Portal Fact Find screen will show all data that has been sent from Truth® for your client to review. As the note at the top states: areas where clients still have work to do are shown in amber. Areas that are ready to submit will show in green.

Clients can click on any section to review the data and make any changes they need to make. They can navigate by clicking “Next” to proceed to the next screen, “Back” to return to the previous screen, or the Home button to return home.

As clients click through, they can add, delete, or edit items as they wish. On each screen, they must either input data or tick the box to indicate that they have nothing to add to indicate that the section is complete. Required fields are indicated with a red asterisk.
Expenditure detail
For each Property, Motor Vehicle, and Child shown in the portal, clients can input expenses. You can suppress these screens in the Portal Configuration options in Truth® if you prefer to use Miscellaneous items. Clients need to input at least one figure on each screen or tick the option to say they have no expenditure.
For each child or grandchild, clients can input regular expenses, one-off expenses (such as wedding costs), and school fees.
On the Spending screen, clients can tell you about their regular spending as well as any planned one-off expenses.
Clients who are not yet retired will be prompted to input up to three levels of regular expenditure: the current value; a value in retirement, and a value in Later Life.
Clients can also add “one-off” future expenses.
Soft Facts and Wills
On the Goals and Objectives screen, clients can tell you about their future plans. These soft facts not only enhance the planner/client relationship but also help you create appropriate recommendations for your clients. Clients can edit and add to objectives that already exist in Truth®, create their own, or choose from ready-made templates to get them started.
In the Wills section, clients can tell us how their estate will be distributed upon death. If they don’t have a will, they must tick the box to indicate this. If they have a will, they can edit it by clicking on the “first death” or “second death” buttons.
Clients can tell us about specific bequests, such as charitable gifts, and how the rest of their estate will be distributed. When adding a new beneficiary, their share is automatically calculated based on the number of beneficiaries. These shares can be overwritten.
Clients can easily add new beneficiaries (such as grandchildren) directly from this screen using the “Add a new Beneficiary” button.
Review & Submit
When your clients have finished data entry, they can review their data on the Review and Submit screen. They can also add notes to their submission, which will also appear in the email notifying you that their data is ready for you in Truth®.

Clients can retract their data, until you have downloaded it into Truth®, if they need to make further changes. Once you’ve downloaded their data, it is deleted from the portal and you can start building your client’s cashflow.
To access the Fact Find Portal, you will need to click on the File menu in the top-left corner, then choose the Fact Find Portal option on the left.
To import data, click “Import client data from Portal”. The badge notification here tells us how many clients are waiting to be imported.
To choose a client from the list, simply tick the box to the left-hand side of the grid, then click the Import Client button to start the import.
Import Review
When you open a client which has been imported from the Portal, a notification will be displayed on the Fact Find indicating the number of changes awaiting review. Click the drop-down arrow, then choose the “Click to Review” option to bring up the Import Review screen.
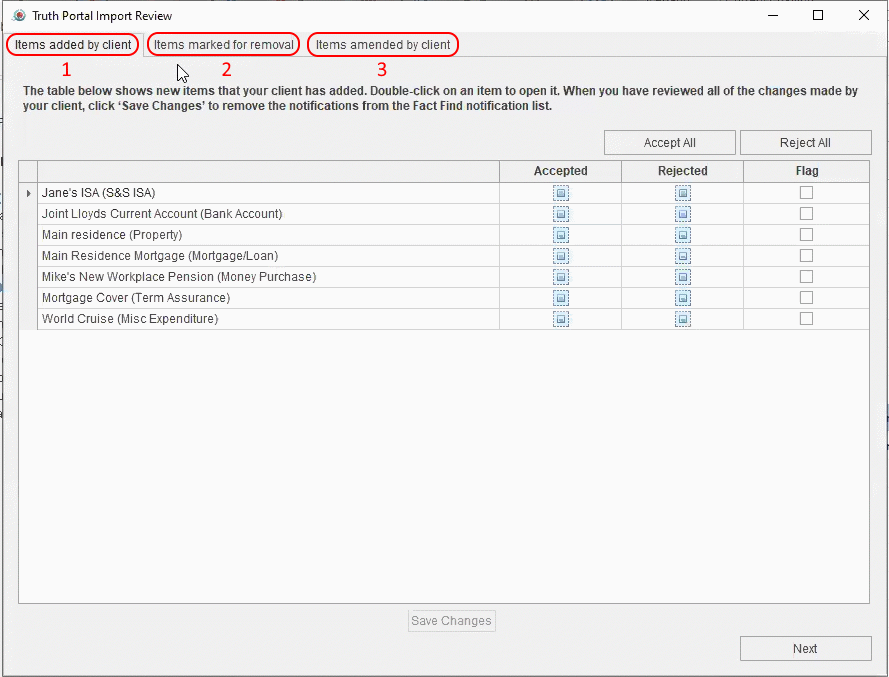
Import Review is broken down into three sections:
- Items added – accept or reject items your client has added. Rejecting items will delete them. You can flag items you accept for review.
- Items marked for removal – accept or reject items your client has marked for removal. Accepting removal will delete the item. Where you reject your client’s request to remove an item, you can flag it for review.
- Items amended – all changes made by your client and by Truth® can be accepted or rejected individually. Any changes, whether accepted or rejected, can be flagged for review.
On each tab, clicking “Next” without saving changes will show a notification telling you that changes will be lost. Click “No”, then “Save Changes” before continuing.
Click “Finish” to complete Import Review. A PDF Summary of your choices will be saved to Contact History.
Import Review Flags
If you’ve marked items for review, you’ll see orange flags in the left-hand column of the Fact Find. Using the Find Flags tool, you can filter the Fact Find to show only items flagged in Import Review.
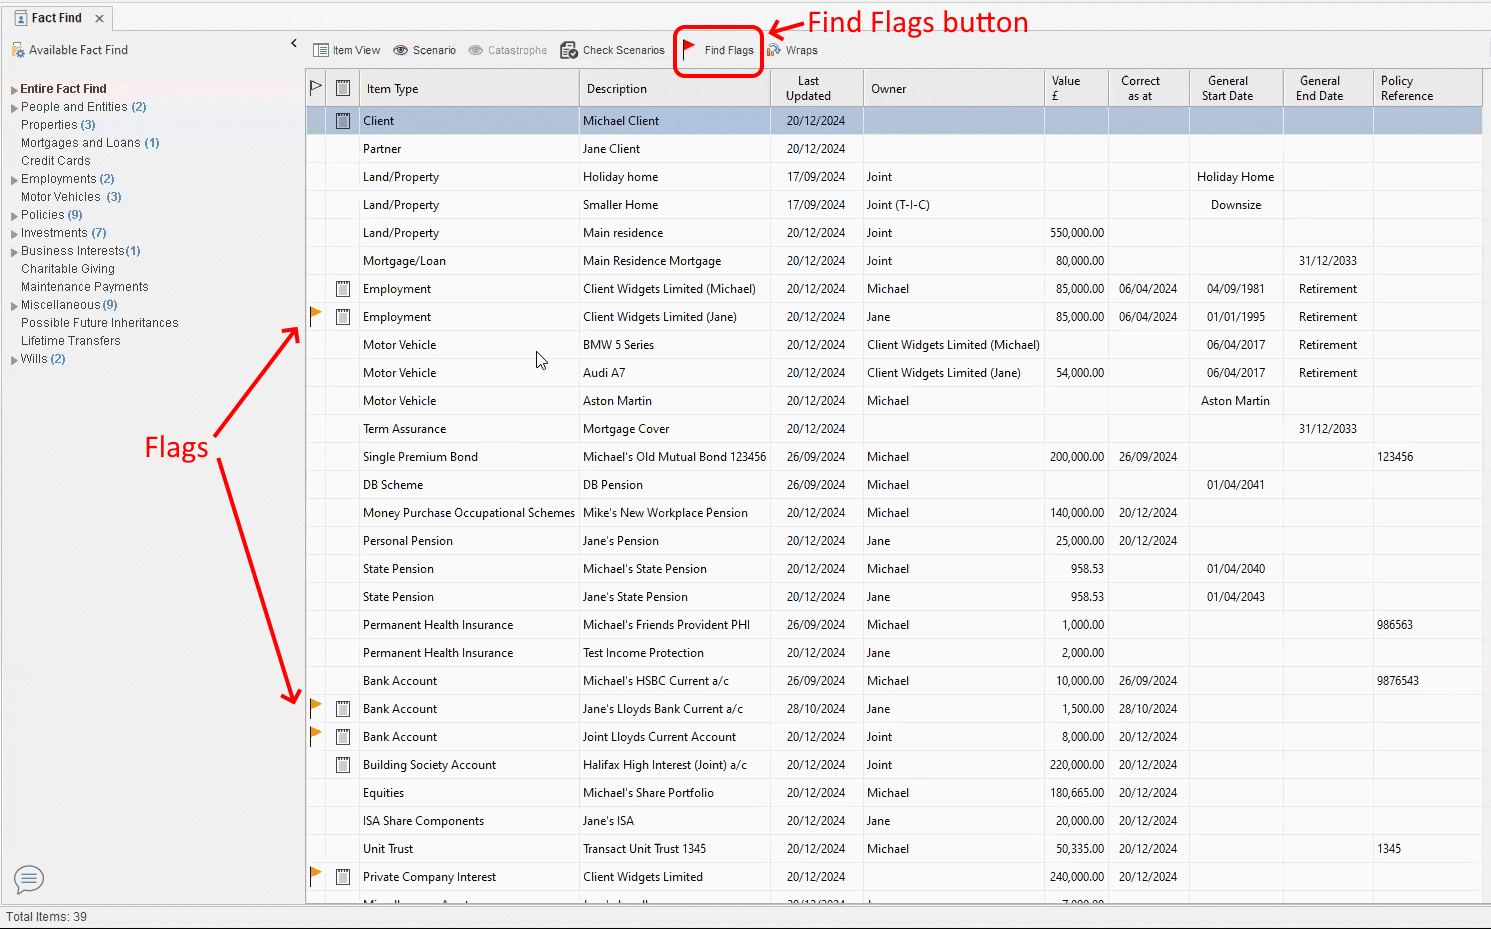
Double-click any item to open it. On the Notes tab, you’ll see the full details of changes you flagged for review.
When you’ve reviewed the item, you can click on the flag and choose “Clear import review flag”. Alternatively, you can clear ALL import review flags using the Find Flags tool.
Audit Trail and Contact History
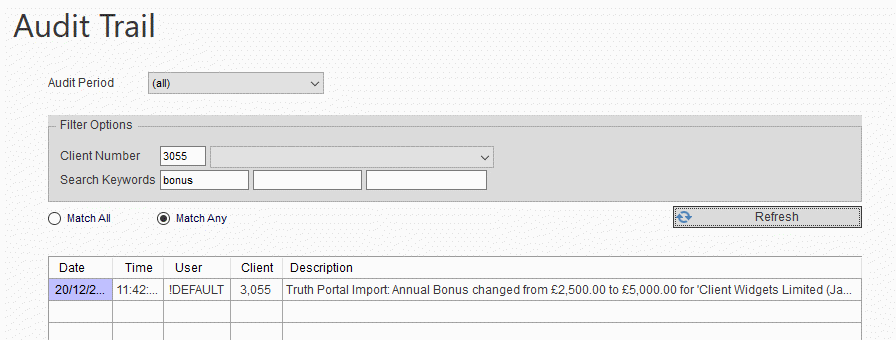
The Audit Trail has been upgraded to show full details of any changes you’ve accepted or rejected. Select a client and input any search keywords. Click “Refresh” to search.
Regardless of whether you have accepted or rejected a change, both the “before” and “After” values will be displayed in the Audit Trail, making it easy to revert changes if needed.
Open the Contact History module, select a client, and on the row in the grid which corresponds to the date and time of your most recent import. Double-click the PDF at the bottom of the screen to open it, or click on the drop-down and choose “Save as” to download a copy to your computer.